Create the role, API agent, and API application in HaloPSA
Create a narrow role, an API-only agent, and an API application in HaloPSA so Lemhi can connect with a client ID and secret.
Written By The Lemhi Product Team
Last updated 1 day ago
For the MSP admin with access to Configuration in HaloPSA. When you finish, you have a role, an API-only agent, and an API application with a client ID and client secret ready to enter in Lemhi.
Lemhi connects to your HaloPSA as an API-only agent through an API application you create, with a narrow role you control. Everything in this article happens in HaloPSA, under Configuration.
Step 1: Create the role
Go to Teams & Agents > Roles and select New.
Enter a Role Name, for example
Lemhi Compass API, and save. The Permissions tab unlocks only after the first save. Every permission on a new role starts as "Not set".On the Permissions tab, set these seven settings:
Leave Is a Halo Administrator at No, and save the role.
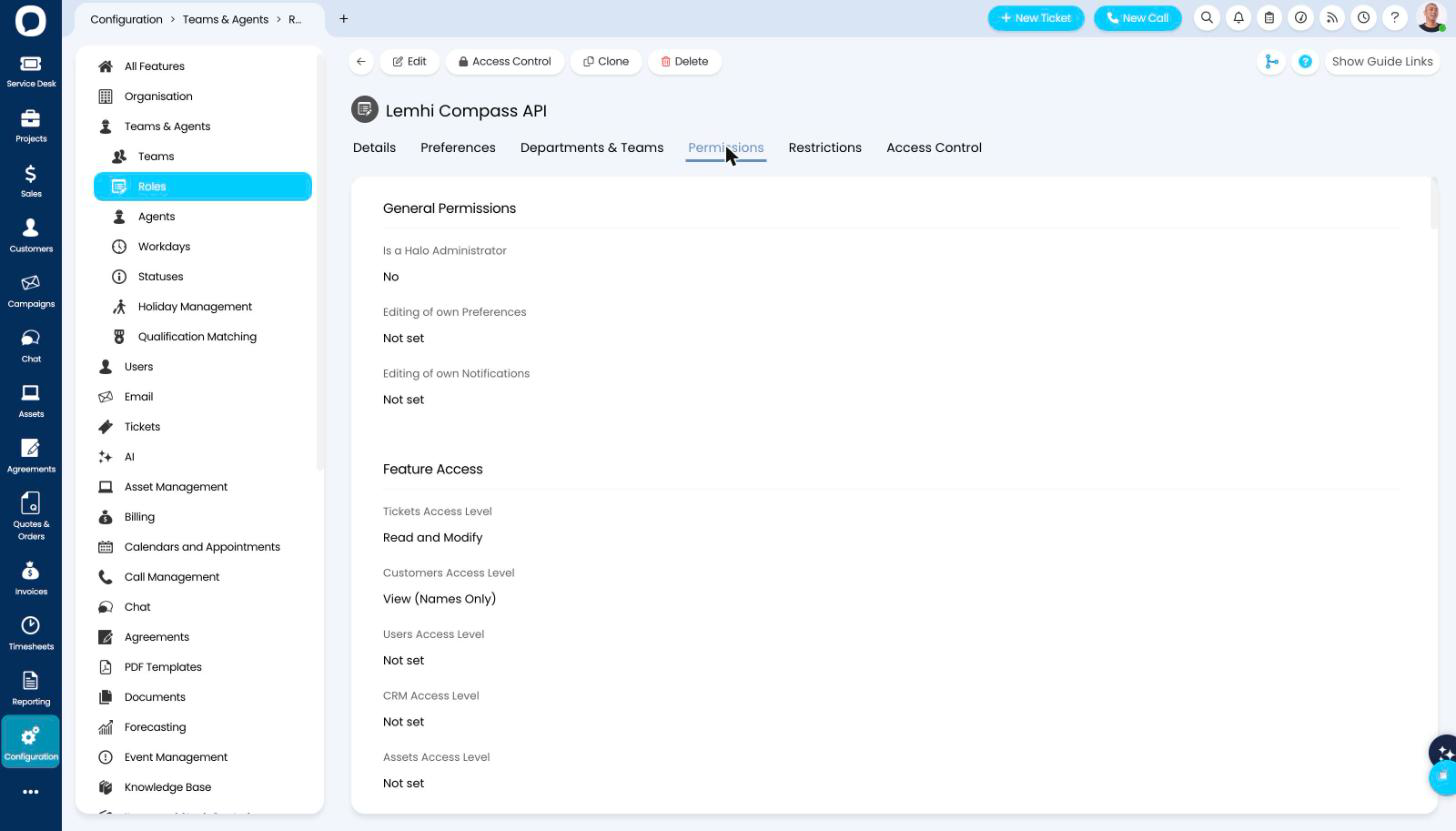
Check: The role saves, and the seven settings above show the values you set.
What each setting lets Lemhi do
The last two only matter when you link an existing ticket. Without them, the link still works but the note is refused.
Step 2: Create the API-only agent
Go to Teams & Agents > Agents and select New.
Fill in the agent:
Save the agent.
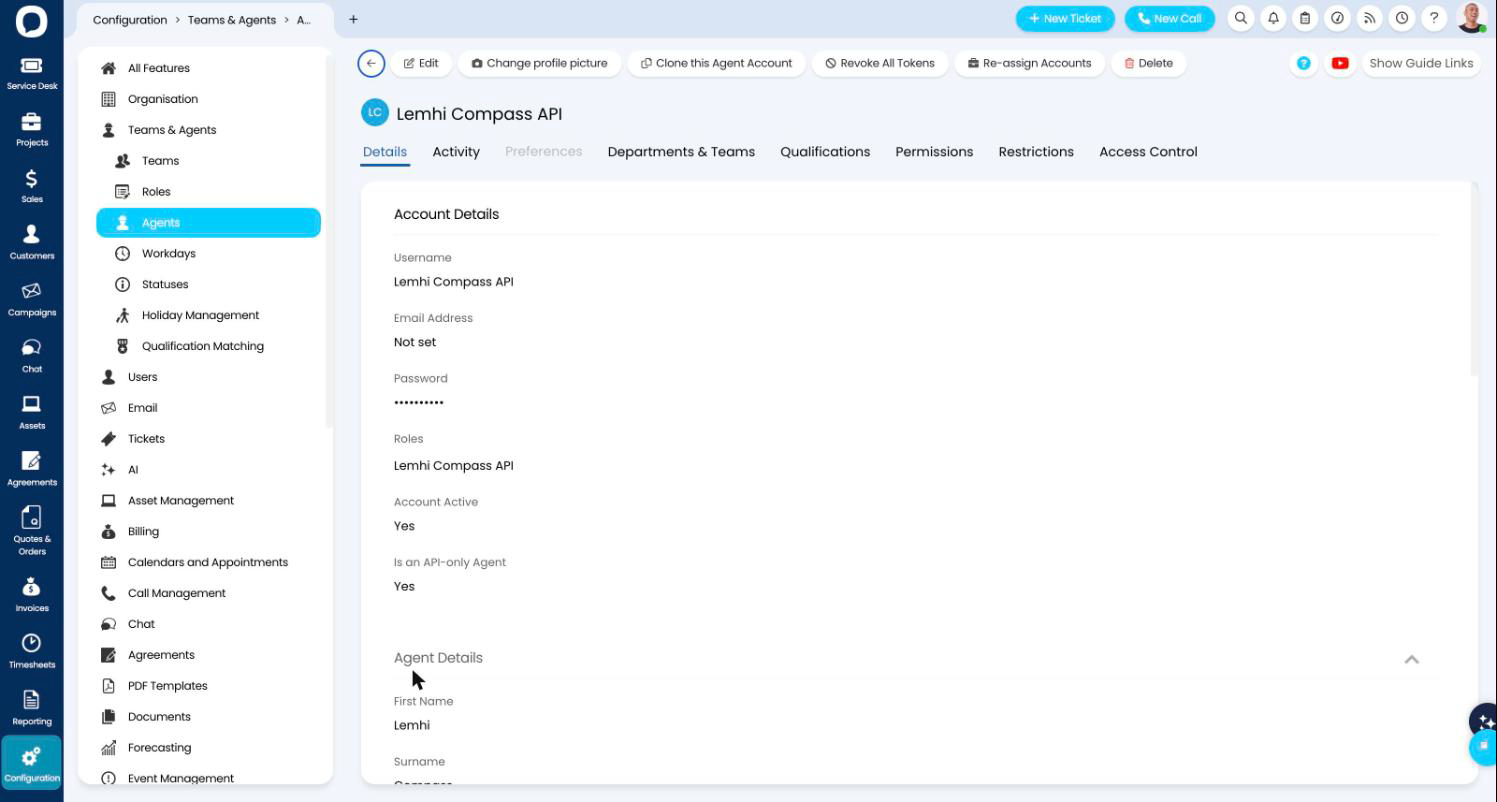
Check: The agent appears in the agent list with the Step 1 role.
API-only agents do not take up a licence. HaloPSA says so on the form. They also cannot log in to the web or mobile apps, and cannot be assigned tickets.
Step 3: Create the API application
Go to Integrations > Halo API. The menu label is "Halo API", not "HaloPSA API". Note the Tenant this page shows; you may need it when you connect in Lemhi.
Select View Applications, then New.
Fill in the application:
Copy the Client ID and the Client Secret, then save the application.
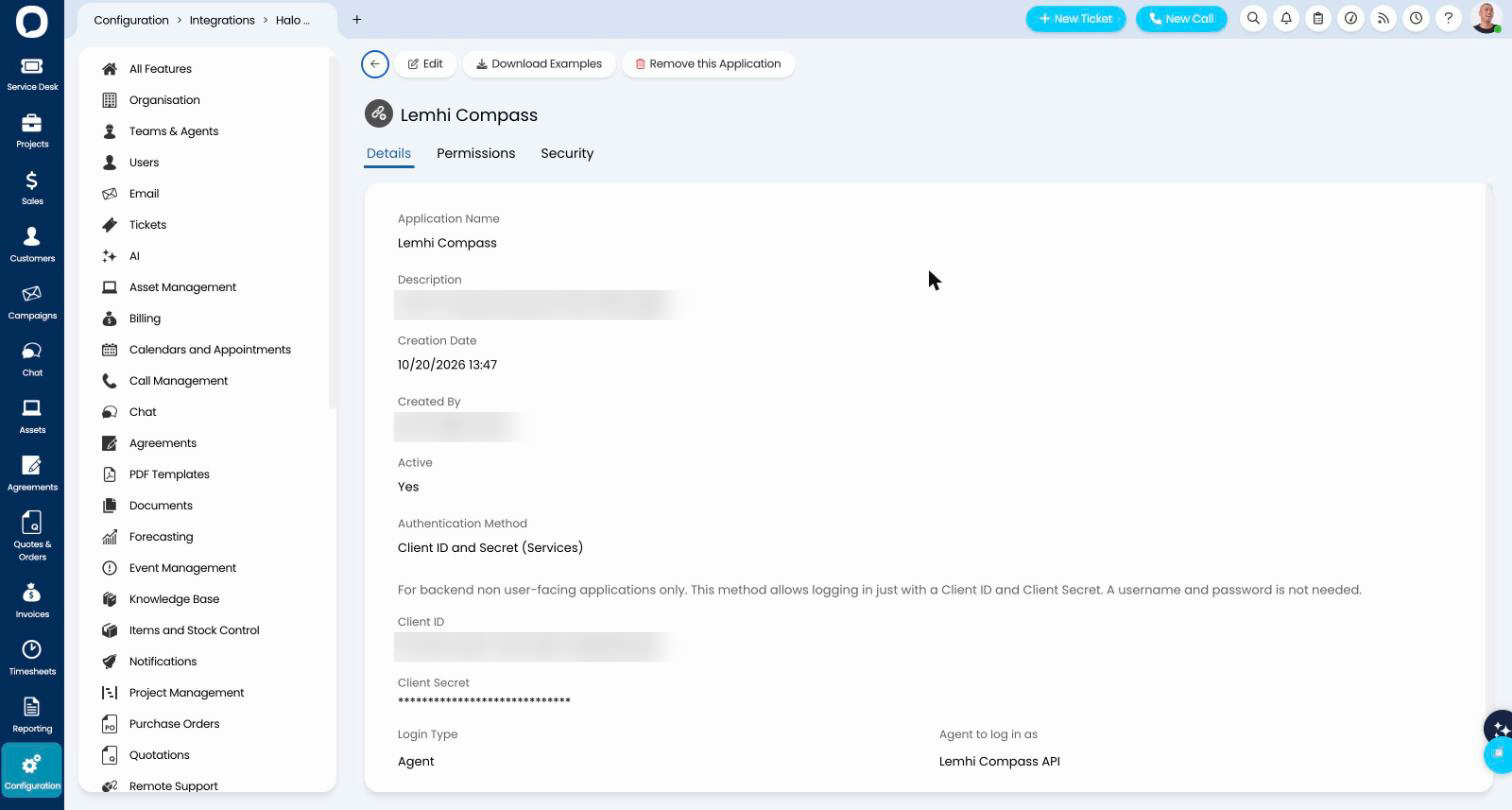
The client secret is shown only once. HaloPSA says so on the page. A secret takes effect only when you save the application after selecting Generate. Generating a new secret stops the old one from working, so if you lose it, generate a new one, save, and use the new one.
Step 4: Give the application its permissions
Edit the application and open its Permissions tab.
Tick only these three:
read:customers,edit:tickets, andall:teams.Save the application.
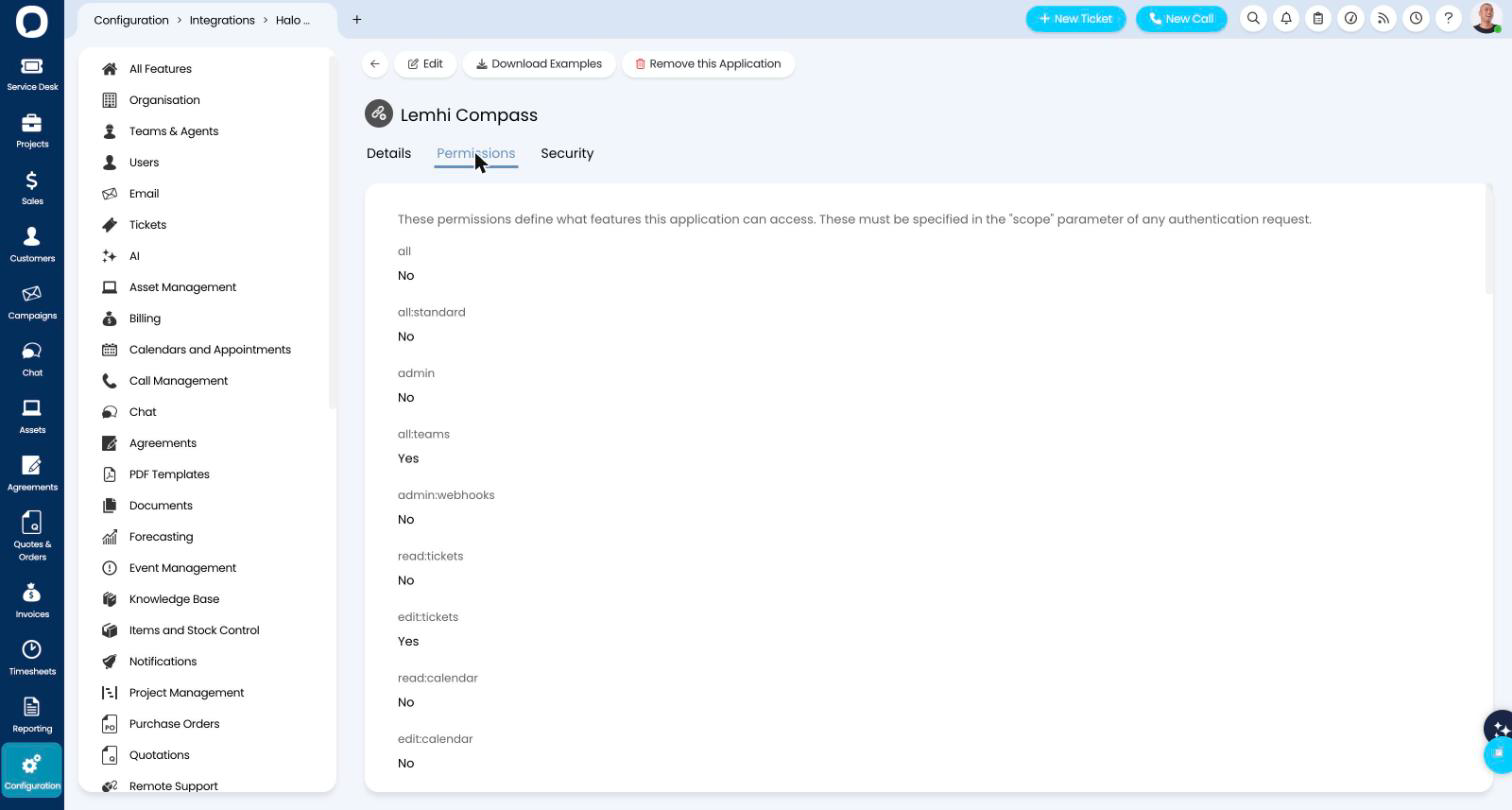
Check: You have the client ID and client secret copied somewhere safe, and the application shows exactly those three permissions.
Do not tick "all" or "admin". HaloPSA's own tab warns that they expose administration level access. Lemhi asks for the three permissions above and nothing more.
Next
Connect HaloPSA to Lemhi and set ticket defaults
Related
Was this helpful?
Still need help? Ask the team