Connect HaloPSA to Lemhi and set ticket defaults
Enter your Halo web address, client ID and secret in Lemhi Settings, then choose the ticket type and team Compass tickets are logged with.
Written By The Lemhi Product Team
Last updated 1 day ago
For a Lemhi Admin. When you finish, Lemhi shows Connected as with your API agent's name and has a default ticket type and team for Compass tickets.
Before you start
You have the client ID and client secret from Create the role, API agent, and API application.
ConnectWise PSA is not connected. Lemhi pushes to one PSA per tenant. While ConnectWise PSA is connected, the HaloPSA Connect button is disabled.
Step 1: Enter the connection details
In Lemhi Engage, open Settings and select Integrations in the Settings menu.
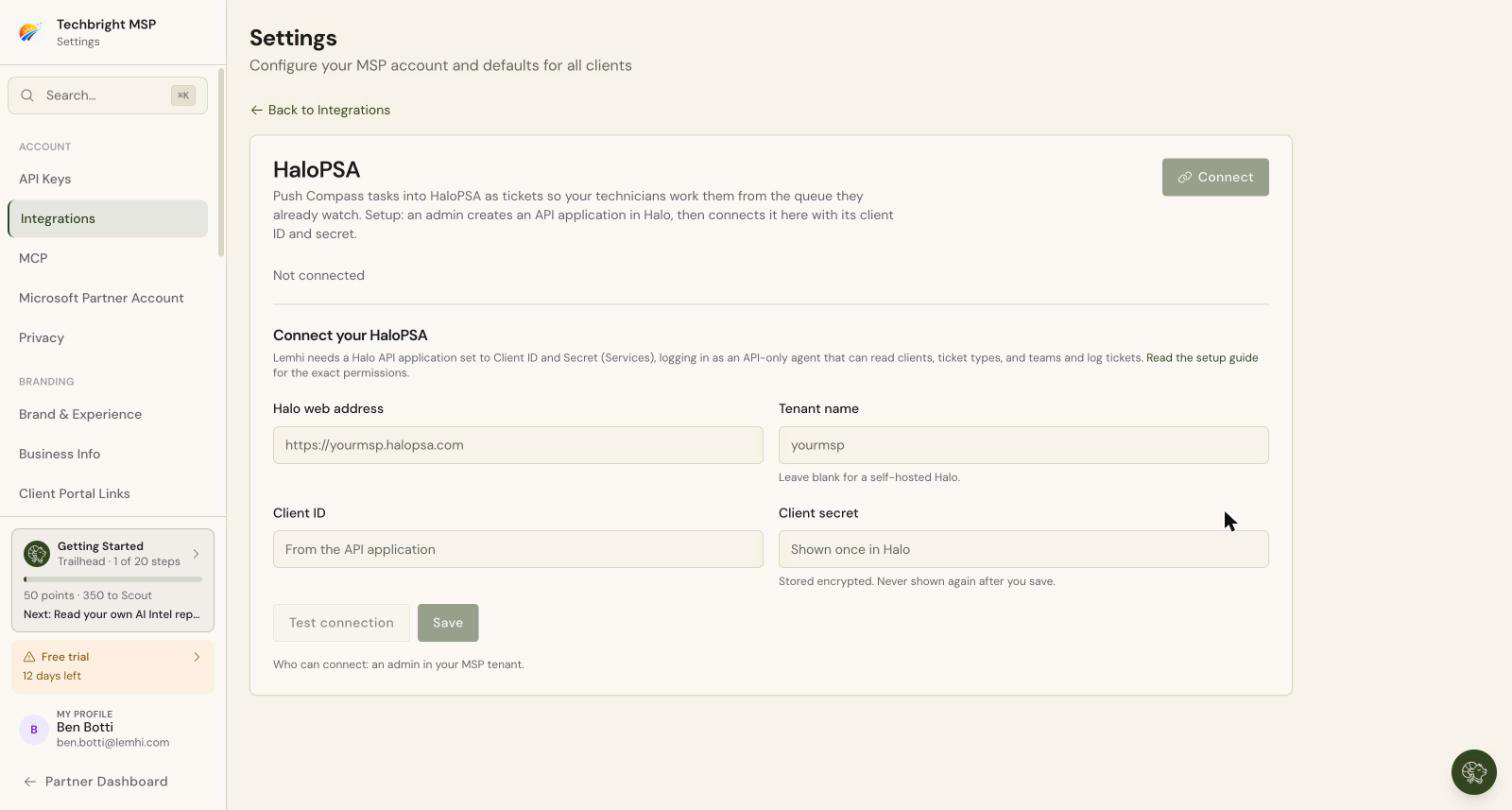
On the HaloPSA card, select Connect. The HaloPSA page opens with Connect your HaloPSA.
Fill in the form:
Select Test connection. When the test passes, you see Connected as followed by your API agent's name. Select Save.
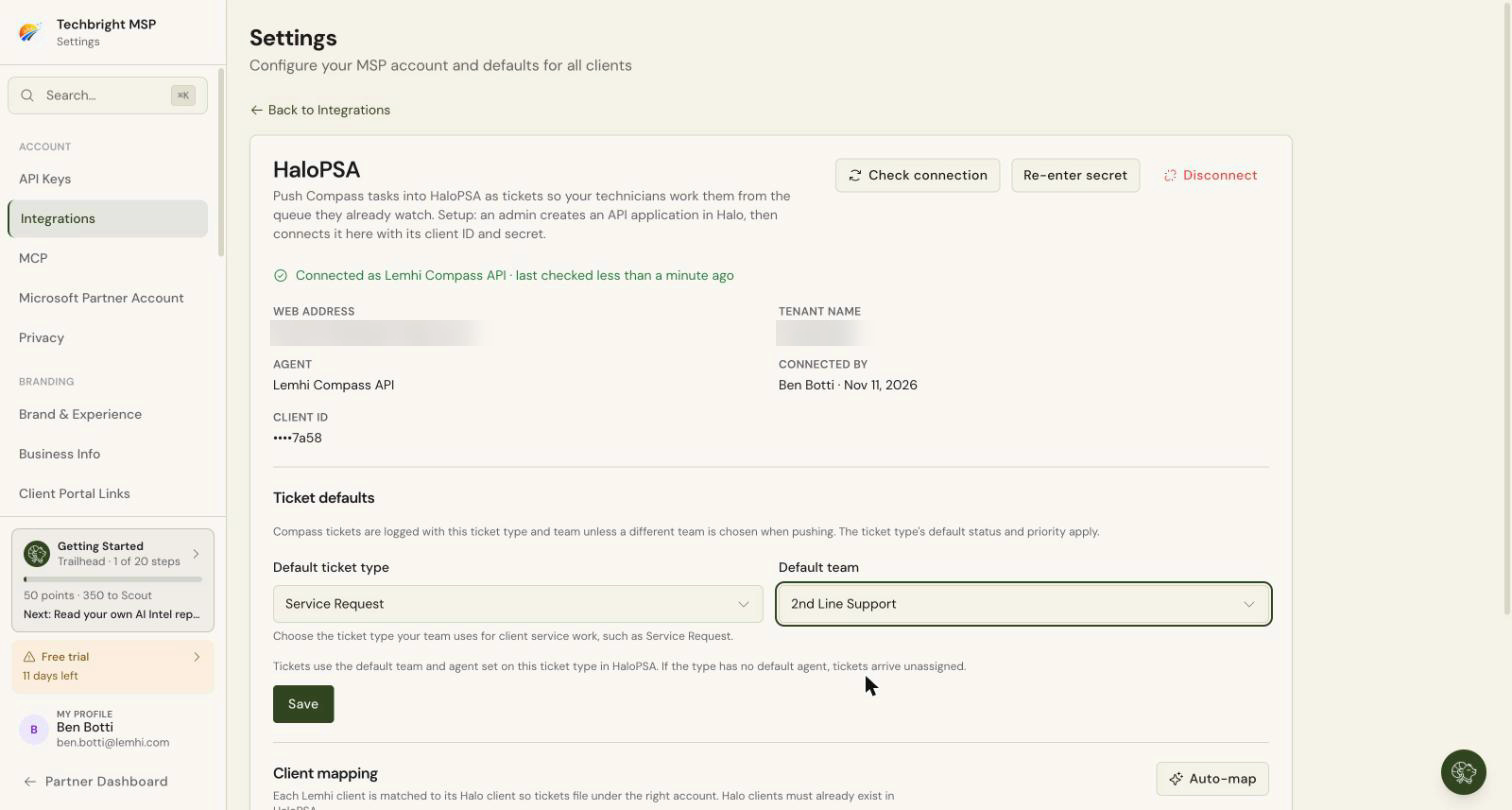
Check: A message says "HaloPSA connected", and the page shows Connected as with the agent name and when the connection was last checked.
The test confirms Lemhi can read your clients, teams, and tickets. It does not log a test ticket, so a missing Can add new Tickets setting on the role first shows up as a failed push. If the test fails, the message names the HaloPSA setting to fix. Find it in HaloPSA errors and fixes.
Lemhi never shows the client secret again. It is stored securely. After you save, the page shows the web address, tenant name, agent, who connected it and when, and the last four characters of the client ID. To replace the secret later, use Re-enter secret.
Step 2: Set the ticket defaults
Under Ticket defaults on the same page:
Choose a Default ticket type. Pick the ticket type your team uses for client service work, such as Service Request.
If that ticket type requires Impact, Urgency, or Category in HaloPSA, a picker appears for each one. Choose a value for each.
Choose a Default team.
Select Save.
Check: A message says "Ticket defaults saved".
Compass tickets are logged with this ticket type and team unless the person pushing picks a different team. The ticket type's default status and priority apply. Tickets use the default agent set on the ticket type in HaloPSA; if the type has no default agent, tickets arrive unassigned.
The ticket type is set here only. The team is the one field a person can change when pushing. The Default team list shows only teams that take tickets in HaloPSA.
Until both a ticket type and a team are saved, pushes are blocked with "No ticket type or team is set".
Changed the ticket type's required fields in HaloPSA? If a ticket type starts requiring Impact, Urgency, or Category after you saved it here, pushes fail with "HaloPSA now requires" and the field names. Open Ticket defaults, choose the ticket type again, pick the new values, and save.
Next
Map clients to HaloPSA clients
Related
Was this helpful?
Still need help? Ask the team